Follow Me

Showing posts with label recipes. Show all posts

Monday, February 13, 2012

Elegant Chicken With Gravy Recipe


Elegant Chicken With Gravy

Today I wanted to may something new in my slow cooker. I have a great
Slow cooker recipe book called Fix-it and Forget it recipes for entertaining.
That is where the recipe I am sharing came from but I changed a few things.
So this is my Elegant Chicken With Gravy recipe.

1- bag 2.5 lb bag of frozen Perdue Chicken Tenderloins
1- 10.5oz Walmart Cream of Mushroom soup
1-Pack of Broccoli Soup
1-Cup of Light Cream
1-Cup of Water
1-Bunch of Fresh Broccoli
1-Italian Dressing for marinating


1. Marinate the chicken in the dressing for aleast an hour
2. In a saucepan put the soup mix, cream, and water heat up until it
    will mix together.
3 Combine in the slower cooker the soup from the saucepan and the can
    of mushroom soup.
4. I added as much Broccoli as I wanted to the soup mix. I used the
    the stems and the crowns. I just chopped up the stem in small pieces.
    Mix it together and then I added garlic and onions because I love them
    and add them to everything.
5. Then I placed the chicken on top.
6. Cover. Cook on high for 3 hours or on low for 6 hours, or until
    chicken is tender but not dry.

Serve over rice or noodles.


recipes,slow cooker,chicken 8SFYCBBRYQTC
submit to reddit

Friday, February 3, 2012

Most Popular Grilled Cheese Sandwich Recipes

Most Popular Grilled Cheese Sandwich Recipes


This is the list of the 10 most popular, The top one is the one I think I am going to try because I LOVE onions lol. What your favorite?

1.
Onion and Bacon Cheese Sandwiches
by Betty Crocker
http://www.recipe.com/onion-and-bacon-cheese-sandwiches/

Give everyday grilled cheese a boost! Top sandwiches with cooked bacon pieces and sliced onion.


Prep Time: 25 mins
Total Time: 25 mins
Servings: 4 sandwiches

Ingredients
4 slices   bacon, cut into 1/2-inch pieces
1 medium   onion, thinly sliced
8 slices  Cheddar cheese (3/4 ounce each)
8 slices   Vienna bread, 1/2 inch thick


Directions
1
In 12-inch nonstick skillet, cook bacon over 
medium heat about 4 minutes, stirring 
occasionally, until almost cooked. Add onion.
Cook 2 to 3 minutes, turning occasionally, 
until tender. Remove bacon and 
onion from skillet. Reserve 1 tablespoon 
drippings in skillet.

2
To make each sandwich, layer cheese, bacon and 
onion between 2 bread slices. Place 2 sandwiches 
in drippings in skillet. Cover and cook over medium-low 
heat 3 to 5 minutes, turning once, until bread is 
crisp and golden brown and cheese is melted. 
Repeat with remaining sandwiches.
TIP:
High Altitude (3500-6500 ft): No change.

Nutrition Facts
Calories 380 (Calories from Fat 180); Total Fat 20g (Saturated Fat 11g, Trans Fat 1g); Cholesterol 50mg; Sodium 740mg; Total Carbohydrate 32g (Dietary Fiber 2g, Sugars 3g); Protein 19g. Daily Values: Vitamin A 10%; Vitamin C 2%; Calcium 25%; Iron 10%. Exchanges: 2 Starch; 0 Other Carbohydrate; 0 Vegetable; 2 High-Fat Meat; 1/2 Fat. Carbohydrate Choices: 2.
Percent Daily Values are based on a 2,000 calorie diet


Pin It
submit to reddit

Monday, January 16, 2012

Windowpane Hearts Cookies


Cute for 

Valentine's Day Treats

 From FamilyFun Magazine


Instructions


  1. To make the dough: Using an electric mixer at medium-high speed, cream the butter, gradually adding the sugar. Beat in the egg until evenly mixed, then blend in the vanilla extract and salt.
  2. With a wooden spoon, stir the flour into the creamed ingredients, about one third at a time, until evenly blended. The dough may seem soft, but it will firm up when refrigerated.
  3. Divide the dough in half. Flatten each portion into a disk and seal in plastic wrap. Refrigerate overnight.
  4. To create the cookies: Heat the oven to 375 degrees. Cover a sturdy baking sheet with aluminum foil and lightly coat the foil with cooking spray. Between 2 sheets of waxed paper lightly dusted with flour, roll the dough to a 1/4-inch thickness. Remove the top sheet.
  5. Cut out the cookies with a large cookie cutter. Use a spatula to transfer the shapes to the baking sheet, leaving about an inch between cookies. Remove the centers of the cookies with a smaller cookie cutter. (Save the centers to bake later.)
  6. Place a hard candy (we used Jolly Ranchers) in the center of each heart and bake until the cookies start to brown lightly around the edges and the candy is melted, about 8 to 10 minutes. Let the cookies cool on the baking sheet for 5 minutes, then transfer them to wire racks to cool completely. To prevent sticking, line your serving plate or tin with waxed paper and place additional waxed paper between layers. Makes 30.

Pin It
submit to reddit

Saturday, January 14, 2012

Sugar Cookie Bowls

Sugar Cookie Bowls


Ingredients:

2 3/4 cups all-purpose flour
1 teaspoon salt
1 cup (2 sticks) unsalted butter, softened
1 1/2 cups granulated sugar
1 egg
1 1/2 teaspoons vanilla extract Easy-Add vanilla extract Add to shopping list vanilla extract
1/2 teaspoon No Color Almond Extract Easy-Add No Color Almond Extract Add to shopping list No Color Almond Extract
Makes:

12 bowls.

Tools:

Ice Cream Cookie Bowl Pan Easy-Add Ice Cream Cookie Bowl Pan Add to shopping list Ice Cream Cookie Bowl Pan
Instructions:

step 1

Preheat oven to 350°F. Spray the outside of each bowl cavity of Ice Cream Cookie Bowl Pan with vegetable pan spray.

step 2

In medium bowl, combine flour and salt. In large bowl, beat butter and sugar with electric mixer until light and fluffy. Beat in egg and extracts. Add flour mixture to butter mixture, 1 cup at a time, mixing after each addition.

step 3

Roll out dough on generously-floured surface to 1/8 in. thickness. Cut 4-1/2 in. circles from dough.. Drape one circle over each bowl cavity of pan, pressing to form smooth surface.

step 4

Bake 11-13 minutes or until cookie cups are firm and golden brown. Cool on pan on cooling rack 10 minutes. Loosen bottom edges of cookies from pan using small spatula. Carefully remove cups from pan and cool completely. Wash, dry and spray pan; repeat with remaining dough.


Pin It
submit to reddit

Friday, January 13, 2012

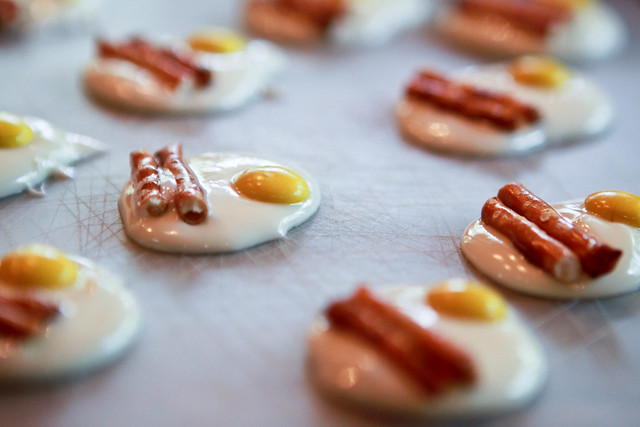
Family Faves--Bacon & Eggs.. White chocolate! Sweet with a bit of salty!

Family Faves--Bacon and Eggs

I can't take any of the credit for this fun project! 
I want to thank  http://nancyvnjourney.blogspot.com/2011/07/family-faves-bacon-eggs.html  for sharing it with me.
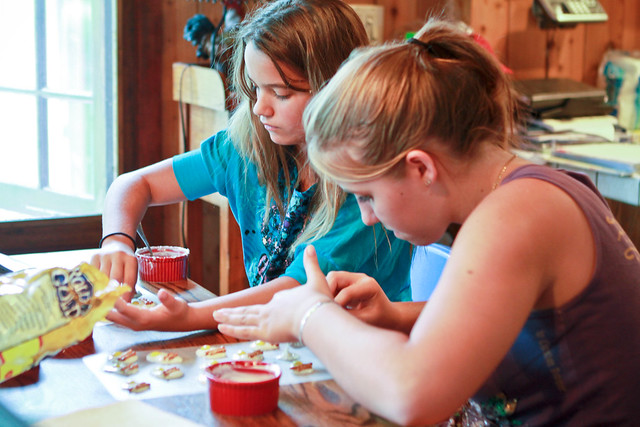
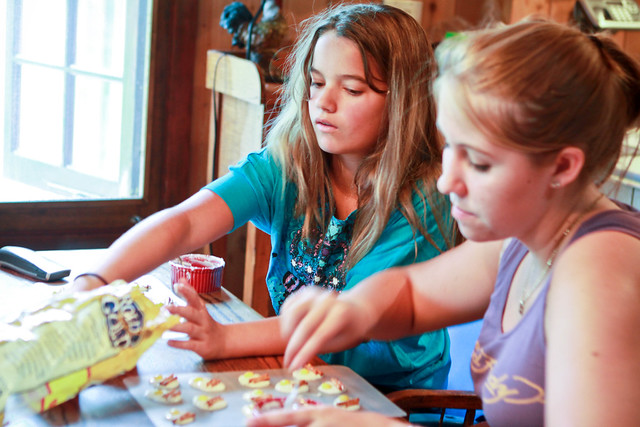
This one is all from my mother-in-law, and the kiddos are ALL OVER IT!
White chocolate!  Sweet with a bit of salty!
Yum!
And really... could it get any better than that?
This is my niece and Livy making them for about the 4th time this week.
A little riddle for y'all - When is a cell phone more than an arm's reach away from a teenager?  Not when making bacon & eggs!  Please keep your cell phone close by in case you need to text someone in a dire candy emergency!  You never know!

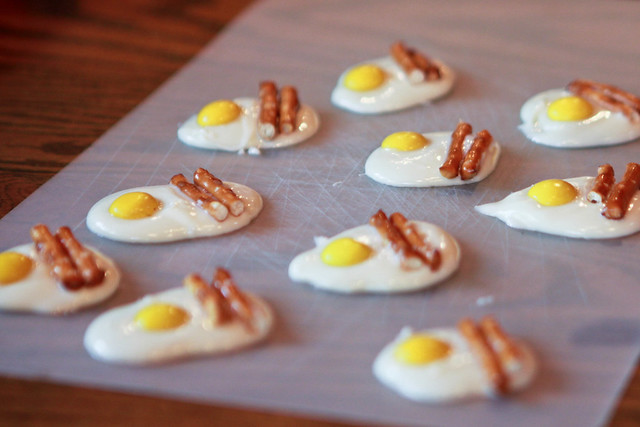
Unlike the previous family faves posts, this isn't really a recipe, but more like assembly instructions.

Ingredients-
---White chocolate chips-melted in the microwave in microwave safe bowl, at 50% power
---M&Ms-pick out all the yellow ones and eat the rest.  See, I told you the kiddos love this project!
---Pretzel sticks

Line a cookie sheet with wax paper.  Blob a bit of melted chocolate on the wax paper about the size of a quarter.  Put a yellow m&m in the center of chocolate blob with the logo down/not showing.  Break the pretzel stick in half and put your 2 "bacon strips" along side egg.  Repeat till you've used up your ingredients or you have to do laundry.  Transfer to refrigerator to chill till chocolate sets about 20-30 min.  

This one is easy enough for my kiddos to do with little supervision.  Especially if I melt the chocolate first and get everything set out on the table.  It's hard to mess up, even for littler kiddos.  

Enjoy!  And let me know how they turn out!
submit to reddit

Thursday, January 12, 2012

How to Make Marshmallow Fondant

How to Make Marshmallow Fondant

 P1150721
Marshmallow fondant is easy to make and pretty fun to use. You can cover cakes and cookies with it to give them a smooth professional-looking finish or you can cut out shapes and designs to decorate your icing with. Its cheaper to make your own fondant than it is to buy it pre-made plus the pre-made stuff tastes a bit like cardboard unless you are willing to pay for a very high end product. 
P1150684
All you need is:
  1. Marshmallows - they can be big marshmallows or mini ones, either one works fine.
  2. Icing sugar - You'll be mixing the icing sugar into the marshmallows to make a dough so I usually make sure that I have an entire bag on hand.. but I rarely use the whole bag.
  3. Food colouring
  4. Flavoring oil - This is optional. If you don't add this your fondant will be sweet and flavorless which works well if your got all the flavors your want in your cake already
    P1150680This time I decided to make it with those mini fruit flavored marshmallows. I had to sort them by colour first. I figured they would add a little bit of flavor to the fondant so I wouldn't have to add much flavoring oil.
    P1150690
    I use gel colours to dye my fondant but regular food colouring will work too. You won't be able to get really dark colours without making your fondant sticky, but for lighter colours you can just even it out with more icing sugar.
    I also had lemon oil and coconut flavoring on hand.. oh la la the value brand  (which still works fine).
    P1150704Step One:
    Take a couple of handfuls of marshmallows and put them in a microwave safe bowl. Add a couple of drops of water and toss the marshmallows in it until they are all a bit damp. If you are going to just make one colour then put the whole bag of marshmallows in the bowl and add a couple of teaspoons of water. If you're going to put flavoring oil in, add it now and add less water
    I like to make smaller batches because its easier to add the colour to the melted marshmallow than it is to work the colour into the fondant later.
    Step Two:
    Stick the marshmallows in the microwave for ten seconds at a time until the are puffed up and easily stir into a goo with a wooden spoon. Tip: Grease your spoon with butter, things can get a bit sticky.
    Step Three:
    Add food colouring  to the melted marshmallows until you get the colour you want. Remember that you're going to be adding icing sugar which will lighten the colour so make it a bit brighter than you need.
    P1150708
    Step Four:
    Start folding icing sugar into the marshmallow goo until it becomes a soft and fluffy dough. Grease your hands with a bit of butter and turn the marshmallow out onto a table sprinkled with icing sugar. Continue to knead in icing sugar until the fondant is stiff enough to roll out.
    If you add too little icing sugar the fondant will be very sticky- Just add more icing sugar
    If you add too much icing sugar the fondant will be very stiff and hard to roll out - knead in a little bit of butter
    P1150710
    Fondant with the icing sugar kneaded in.
    P1150721
    Finished fondant!
    For this batch of colours I made larger batches of lighter colours and then worked some extra gel colouring into the already made fondant to make smaller batches of darker colours. The dark purple and dark green were made from the a light pink and light green.
    All you need to do is knead the gel colour in.. it takes a while to get it all mixed in which is why I only do it for smaller batches.
    P1150733
    To store your fondant wrap them in pieces of lightly greased plastic wrap and keep them either in a big ziplock bag or a tupperware container. The fondant is essentially a sugar paste (its just marshmallows and icing sugar) so it has a shelf life of three or four months. If it feels a bit stiff and hard to use after being stored for a long time you can soften it up by kneading a bit of butter in or putting in the microwave one-two seconds at a time.
    P1150735
    Now its ready to roll out and use to decorate your cakes and cookies!
    submit to reddit

    Chicken Enchilada Dip...sounds good

    Chicken Enchilada Dip

    This dip is something I tried at one of my in-laws Christmas get-togethers. Studdly Hubby's grandmother had brought it and I could have easily devoured the whole thing by myself! I was a little obsessed with it after that so I got on Google and hunted down the recipe. I found it onAllRecipes.com

    Feel free to make this one, but I feel have the responsibility to warn you: It is addictive. It's not like Pringles. I can stop eating those. It's much more dangerous. I could eat the whole pan by myself. 

    There. Any addictions, burst stomachs or digestive issues are not my problem. I warned you.

    Here we go!

    Begin by roasting about a pound of chicken breasts for 20 minutes or until fully cooked. I did this step this morning so I could let the chicken cool for the next step - shredding it. For this, I just use 2 forks and go to town.


    It's pretty brutal.
    Once all the chicken is shredded, throw it all into a large mixing bowl.

    There. The hard part is over! Now you just add the rest of the ingredients, and mix thoroughly. 
    Unmixed...don't those chiles on top look lovely?
    All mixed up and ready to be spread into the baking dish.

    Ladies and Gentlemen, here it is, in all its baked cheesy glory:

    It doesn't look like much, but believe me...it's like a drug. The
    most delicious narcotic you will ever encounter.

    I'm having a hard time stopping myself from continuing to shoveling more of this delightful concoction into my face. Like I said. You were warned!!

    Om non nom!

    Ingredients:

    • -1 pound skinless, boneless chicken breast halves
    • -1 (8 ounce) package cream cheese, softened
    • -1 (8 ounce) jar mayonnaise
    • -1 (8 ounce) package shredded Cheddar cheese
    • -1 (4 ounce) can diced green chile peppers
    • -1 jalapeno pepper, finely diced (Optional! I skipped this.)

    Directions:

    -Preheat oven to 350 degrees F (175 degrees C). Place chicken breast halves on a medium baking sheet.

    -Bake in the preheated oven 20 minutes, or until no longer pink. Remove from heat, cool and shred.

    -Place shredded chicken in a medium bowl, and mix in cream cheese, mayonnaise, Cheddar cheese, green chile peppers (and jalapeno pepper, if you choose). Transfer the chicken mixture to a medium baking dish.

    -Bake uncovered in the preheated oven 30 minutes, or until the edges are golden brown.

    submit to reddit
    Related Posts Plugin for WordPress, Blogger...